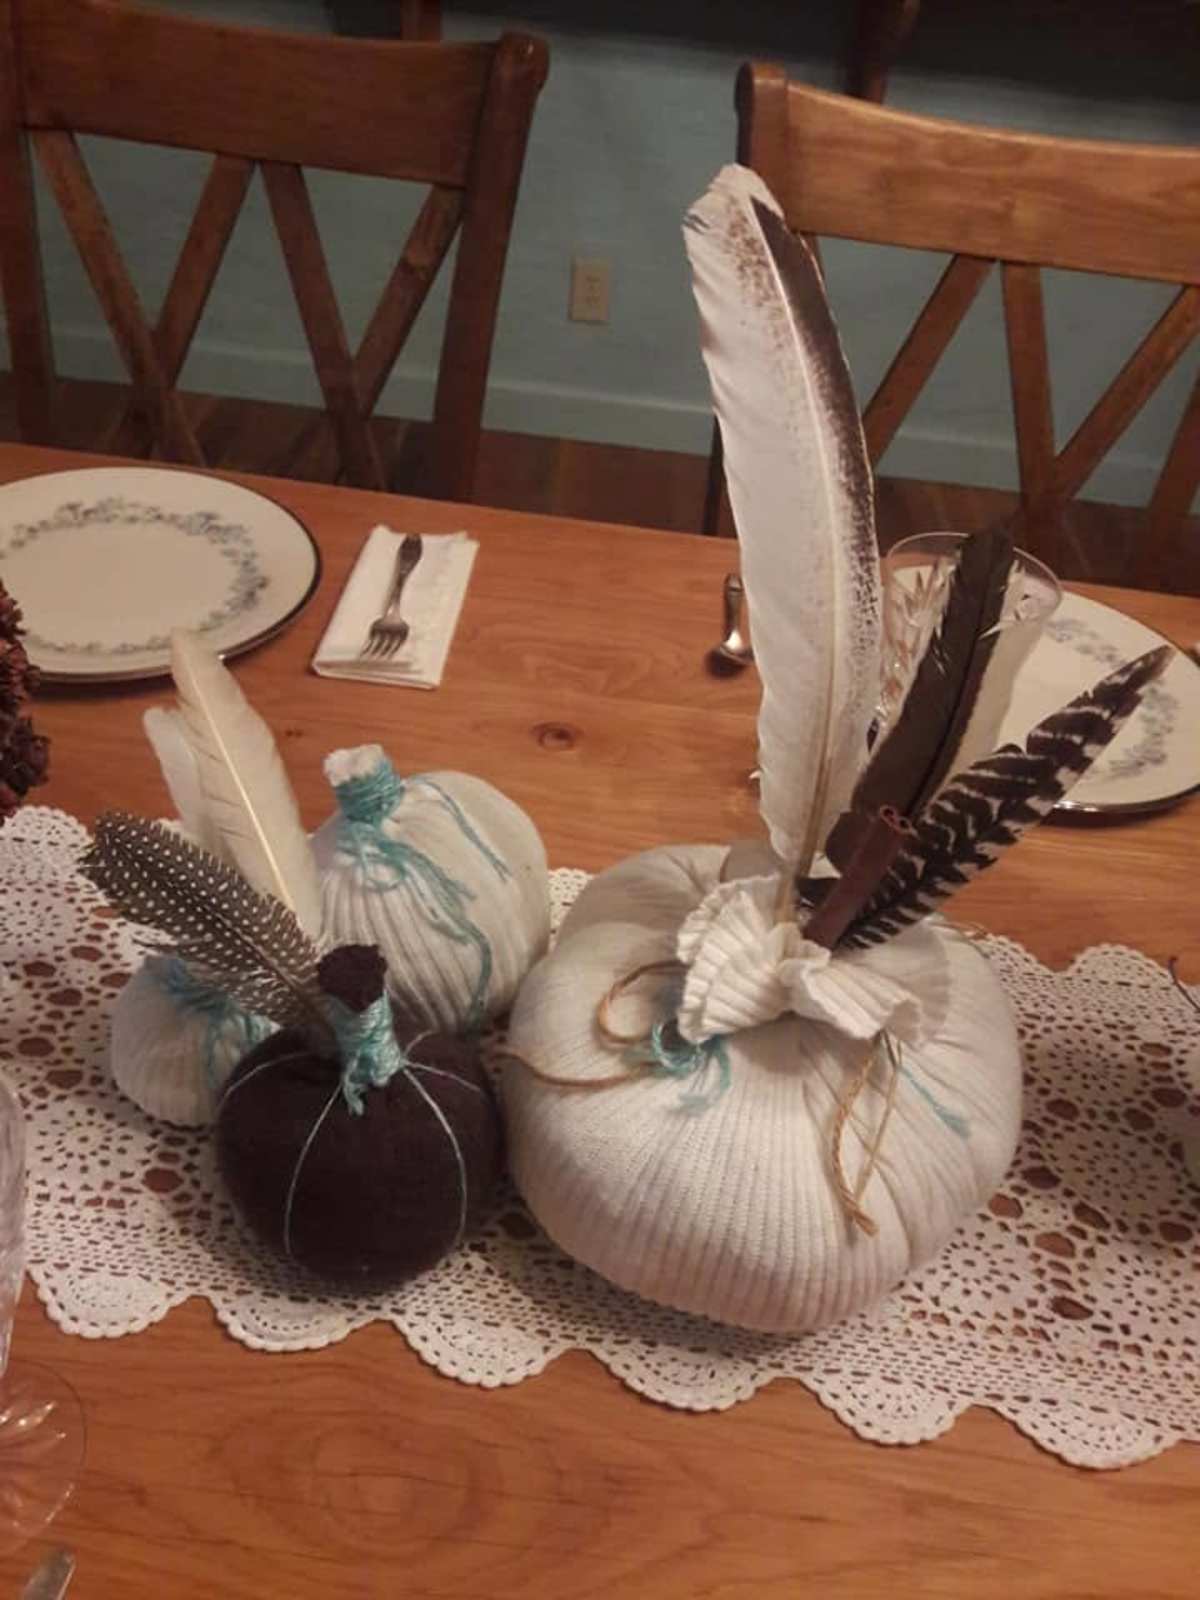
Craft cozy pumpkins for your fall or Thanksgiving table using the sleeves and torso of a sweater. Choose one, two or three sweaters in colors that compliment your dining table dinnerware. Using three sweaters: brown, aqua, and cream I made a bunch of pumpkins to decorate our harvest table. The sweaters can be any size. From one sweater, you should get four or more pumpkins using the sleeves and torso. Thrift stores are ideal places to hunt for sweaters for this fall craft project if you don’t have one on hand to use.
To make sweater pumpkins, gather these supplies:
Sweaters, cable knit or textured look the best
Polyester fiberfill, pillow stuffing, or plastic shopping bags
Jute twine, yarn, or embroidery floss
Large rubber bands
For the pumpkin stems - feathers, twigs, wine corks, cinnamon sticks, or individually wrapped, hard candy sticks in autumn colors
Optional embellishments - artificial autumn leaves, flowers, ribbon, bows.
Sewing scissors
Hot glue gun and glue sticks
Step-by-step Instructions:
1. Cutting.
Cut off the sweater sleeves below the shoulder, straight across, to desired length. To make pumpkins from the torso of a sweater, cut circles to desired size, from the front and back.
2. Filling and Securing the Top.
Turn the sleeve inside out and secure the cut end of the tube tightly with a rubber band or twine. This will serve as the bottom of the pumpkin. Turn right side out and stuff with fiberfill or shopping bags until plump and round, or to desired shape. Slip a rubber band over the cuff end. Wrap yarn or twine around the rubber band and continue winding upward to create and wrap the stem. (See small pumpkins in photograph.) Cut stem to desired length and secure yarn with a glue gun.
To make a pumpkin from the torso, cut circles from the sweater front and back, to desired sizes. Take a circle in one hand. Place fiberfill in the center. Gather and tightly secure the opening with a rubber band. Leave a few inches at the top to create a ruffled effect at the top as shown in the photograph. (See the far-right pumpkin in the photo.)
3. Creating the Indented Sections.
Wrap yarn or twine vertically from the top of the pumpkin to the bottom and around the outside about five times, pulling tightly to form the creased sections. You can use a large needle and embroidery floss to secure the vertical stripes in place, if desired. Tie a knot at the top or bottom and hide it under a rubber band or twine.
4. Embellish. I love feathers, as you can see in the photo. I used them to add an elegant, crowning touch to the pumpkins along with cinnamon sticks. You can get as fancy as you wish, and affix faux leaves, flowers, vines, and ribbons, as desired.
What’s your favorite Thanksgiving table decoration? If you make sweater pumpkins, I’d love to see them. Share a picture to my Facebook author page in the comments beneath this post.
By Deborah S. Tukua, author, and freelance writer
Stay in touch. Join our list at www.DeborahSTukua.com